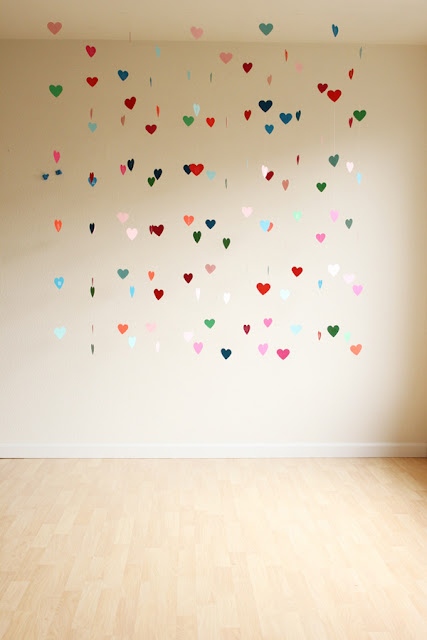
I'm crazy about hearts this year. I've been planning this DIY for quiet sometime now! So I got inspired to making this DIY when I saw wall hangings in a furnishing store. So, I set off to the craft store and grabbed the biggest heart punch they had and went home to punch my crafty little heart out.
You will need: clear fishing line, heart punch, card stock in fun colors, tape (regular-scotch tape will do), and scissors.
Use the punch and punch away as many hearts as you can. For this set up in the picture, I needed 20 garlands with 6 hearts each. I used 6 colors & only needed 20 hearts of each color, plus a few extra to mix and match here and there.

Once all of your hearts are cut out, make 20 sets of 6. Try and mix up the colors so each stack is a little different. Cut a piece of fishing line and strand your garland on the table with tape. Fishing line is a bit tricky to work with and you can lose your pieces really easily. Set up a work space on the floor. Measure the distance from the ceiling to where you want the last heart to land. Tear off ten pieces of scotch tape and place five on each end about six inches apart. Take the fishing line and pull it out 12 inches. Tape it down at one end of the floor and pull the spool down to the second piece of tape. Tape the line taut and cut. Start at the other end and tape down four more pieces. Once your lines are taped, add each set of hearts by lining up the center of the heart underneath each line, about a foot apart. Repeat until you have all of your hearts under the lines. Check and move colors around until it looks fabulous!
Then take a small piece of tape and attach each heart to the line. Make sure all of your hearts are attached before peeling back the painters tape and hanging. Hang your garlands one at a time, starting five feet from the wall, and hang one garland to the edge of your photo booth area. Add the remaining garlands 1 foot apart, also attaching to the ceiling. Hang the rest of the garlands and repeat with the next two rows.
You can make as many garlands as you want and store them. Keep them in separate ziplock covers to keep the garlands from tangling.
Once they are all hung, pop in the middle of them and smile! These would be really fun in an ombre where the color is fades as it gets closer to the floor or even just a solid color. This is one of those projects that just makes me happy in my heart!
Another great thing about this project is that you can make them in practically any shape! You needn't necessarily buy a punch you can just cut the colored card stock into strips of paper in a solid or ombre fashion and do the same as above! It would just look amazing. Check this one out!
Hope you guys enjoyed the DIY! Keep Crafting, Stay Glam & Flash that Million Dollar Smile! ^_^


No comments:
Post a Comment