Saturday, April 30, 2016

April 30, 2016 0

STYLING SHORT KURTIS / STYLING FLORAL PANTS


We all know how college is and  I know what a pressure it is to always put the best foot forward, always be alert on our toes and be absolutely presentable through out the day! 

And then there are the others who put very little effort into their apperance! The way we dress and present ourselves is such an important part of preparing ourselves for success. After all, our clothes and appearance speak volumes about us, way before we get to speak a word, they talk about our attitude, our confidence and our character/identity. So to help out all those out there who're maybe a little confused about putting together a simple outfit for a regular day, this might help

STYLING SHORT KURTIS / STYLING FLORAL PANTS

Short Kurtis and Jeans, Short Kurtis and Jeggings are quiet common outfits but to add a twist to the regular outfits why not try floral pants and throw on a pair of comfy flats or stilettos for the edgy feel.
I put together three outfits based on the same idea, here goes:

OUTFIT #1

For this outfit, I picked a black tunic which is a basic piece in most of our closets and of course, floral pants. For footwear, as you feel like that day, you can wear either striking stilettos or comfy nude flats.


OUTFIT #2

For this particular look, I preferred a basic black kaftan. I'm very much into kaftans this year. They're more 
comfortable and pretty easy to carry off. Again, a pair of floral pants and a pair of hot pink stilettos that complement the floral pants and add that much needed pop of color.


OUTFIT #3

For the final look, I chose an orange tunic with a belt which would help compliment your body type. You can opt not to wear the belt too. A pair of floral pants and nude stilettos, you're done! Now, don't you look glamorous! 


Nude flats or stilettos go with almost any outfit as they are neutral in tone. And it is not a compulsion to wear stilettos, you can always wear flats in a color that compliment the outfit! 

Experiment with your ideas and explore to find your style with floral pants!

Hope you guys had fun! Stay Glam, Keep Crafting & Flash that Million Dollar Smile! ^_^
April 30, 2016 0

Products Wars

Let's get straight down to business! I recently bought almost all of the Revlon's Just Bitten Balm Stains! And previously I had also tried the Revlon Lip Butter! I know you guys must have guessed it.. Yes! It's product war time alright!

REVLON LIP BUTTER
Revlon lip butter feels quite smooth , almost a jelly- like substance on your lips. 
It has a glossy finish and you can totally skip the gloss if, you are a gloss person.
It is also very moisturizing but doesn't last as much long as expected.
Overall its a decent bargain for someone who wants to buy a lip product that is between a lip gloss and a lip stick!
I am a matte person so, not very pleased with the product but great if you have the mood for a little glossiness! 

REVLON JUST BITTEN KISSABLE BALM STAIN
Revlon just bitten kissable balm stain has a slightly glossy finish which I prefer and with the right technique of application they can almost look matte! The colors that are light are more build-able.  And as you can tell, it's a tinted balm. I prefer tinted balms/lip stains to lipstick any day as they're more fun to experiment with. Darker shades are more opaque and aren't as quite build-able but come on! I mean, that's the reason why they're dark!. It would take  2 to 3 applications for full coverage.
Just bitten balm stains are long lasting and can last up to 6-8 hrs which is great for someone like me who doesn't really look to making touch ups every  now and then.
If you're looking for something remotely glossy and a lip stain craze like me, 
your search ends here!! Go and get one NOW!

AND THE WINNER IS!
You can probably already tell by now that I'm all out for the REVLON JUST BITTEN KISSABLE BALM STAIN! I love the colors, the feel and the nude stain has made me fall in love with it! Also, the peppermint smell of these drives me crazy! And the biggest advantage is that these last long! 
Well! Try both the products and you might as well decide for yourself!

Hope you guys had fun! Stay Glam, Keep Crafting & Flash that Million Dollar Smile! ^_^
April 30, 2016 0

Choco - Mint Cookies (Bites)

Choco - Mint Cookies (Bites)

The Choco mint cookies are not our conventional baking style cookies. In fact, this recipe doesn't involve baking at all! They are a great way to beat the heat and unbelievably easy to make. And you still haven't heard the best part, they take only a few minutes to make!

So, lets quickly get into the recipe

What you will need:

  • 1 cup of Cashews


  • 10 - 12 Dates (Seedless)


  • 1 cup of Oats


  • 2 - 3 tablespoons of  Cocoa Powder


  • 4 tablespoons of Milk


  • 1/2 a teaspoon of Mint Extract


Directions:

  • In the blender mix the cashews and oats until they are like flour.


  • Then add the dates, cocoa powder, milk and peppermint extract.
  • And mix until a dough starts to form.

  • If the dough looks dry, add more milk.

  • Then, roll into balls and place on a parchment lined baking sheet.

  • Refrigerate for 15-20 mins to firm up and they are ready to be gorged into!  

Let me know how this recipe turned out after trying it out!
Happy Baking! ^_^  
Oh wait! It doesn't involve baking! Good Luck!


April 30, 2016 0

DIY Photo Background

I'm crazy about hearts this year. I've been planning this DIY for quiet sometime now! So I got inspired to making this DIY when I saw wall hangings in a furnishing store. So, I set off to the craft store and grabbed the biggest heart punch they had and went home to punch my crafty little heart out

You will need: clear fishing line, heart punch, card stock in fun colors, tape (regular-scotch tape will do), and scissors.


Use the punch and punch away as many hearts as you can.  For this set up in the picture, I needed 20 garlands with 6 hearts each. I used 6 colors & only needed 20 hearts of each color, plus a few extra to mix and match here and there.


Once all of your hearts are cut out, make 20 sets of 6. Try and mix up the colors so each stack is a little different. Cut a piece of fishing line and strand your garland on the table with tape. Fishing line is a bit tricky to work with and you can lose your pieces really easily. Set up a work space on the floor. Measure the distance  from the ceiling to where you want the last heart to land.  Tear off ten pieces of scotch tape and place five on each end about six inches apart. Take the fishing line and pull it out 12 inches. Tape it down at one end of the floor and pull the spool down to the second piece of tape. Tape the line taut and cut. Start at the other end and tape down four more pieces. Once your lines are taped, add each set of hearts by lining up the center of the heart underneath each line, about a foot apart. Repeat until you have all of your hearts under the lines. Check and move colors around until it looks fabulous!

Then take a small piece of tape and attach each heart to the line. Make sure all of your hearts are attached before peeling back the painters tape and hanging. Hang your garlands one at a time, starting five feet from the wall, and hang one garland to the edge of your photo booth area.  Add the remaining garlands 1 foot apart, also attaching to the ceiling.  Hang the rest of the garlands and repeat with the next two rows.

You can make as many garlands as you want and store them. Keep them in separate ziplock covers to keep the garlands from tangling.

Once they are all hung, pop in the middle of them and smile! These would be really fun in an ombre where the color is fades as it gets closer to the floor or even just a solid color. This is one of those projects  that just makes me happy in my heart!

Another great thing about this project is that you can make them in practically any shape! You needn't necessarily buy a punch you can just cut the colored card stock into strips of paper in a solid or ombre fashion and do the same as above! It would just look amazing. Check this one out!

Hope you guys enjoyed the DIY! Keep Crafting, Stay Glam & Flash that Million Dollar Smile! ^_^


April 30, 2016 0

BAKE PERFECT CAKES!


Today I'm going to share with you a small tip that will help you bake your cakes evenly! That flat surface we dream of having to get that perfect icing! It's frustrating to use the cake leveler and throw away/eat all the excess cake you had to cut off to level or even the cake surface. No more of that now!
BAKE PERFECT CAKES!
You will need:
An old towel or hand towel
Safety Pins/Paper Clips
Water
Start by cutting your towel into strips that are approximately the width of your baking tin.
Now, wet your towel strips under running water and lightly ring them out as we don't want them to be dripping wet neither too dry.
Take the wet strips of towel and wrap them around the cake tins and secure the ends tightly ensuring they don't slip from the tins using a safety pin or paper clip. You can use more than one towel strip, if your cake tin is large in radius.
Before popping the cake tin into the oven, place your cake tin on a cookie sheet as you don't want any water accidentally dripping in to oven & this way your towels wouldn't dry out too fast.
The strips of cold towels will keep the temperature of the pans cooler which allows the outer rim of the cakes from cooking way too quickly, allowing the cakes to cook in an even fashion.
And just like that you have a perfectly leveled and flat surfaced cake to work your magic icing on!
And here is the finished product!
Let me know how your cake turned out after trying this little trick!
Happy Baking! ^_^


April 30, 2016 0

The Waterfall Braid


Here is a little something for you guys to try! It's been my recent favorite and I'm obsessed with this hairstyle! Give it a try!
THE WATERFALL BRAID

Do try this and let me know how it came out for you!
Hope you guys had fun! Stay Glam, Keep Crafting & Flash that Million Dollar Smile! ^_^

April 30, 2016 0

Baking essentials - Tools (Beginner Level)

Baking essentials - Tools (Beginner Level) :

One of the most common questions in the mind of an amateur baker is figuring out the tools they might need to bake. Trust me, I know! I, myself have started out recently and I had a lot of questions going on. But then, eventually I figured out what is needed the hard way. By posting this, I’m hoping to be of help to all those of you who are just starting out to explore baking! ^_^
      1.  Spatulas:
       I have around four-five spatulas laying around my kitchen. The spatulas are saviors  they can take a beating and what do you know! They’re still in perfect shape! Also, the added bonus is that they’re fun and bright in colors!


 2. Hand Mixer: 
      It’s not necessary to have a stand mixer, you can get a hand mixer and if that’s out of budget for you, you can still get the manual hand mixer which would mean saving a buck but sweating it out in the kitchen while whipping up the egg whites! These things are light and easy to store!


   3.  Basic Baking Pans: 
      Let’s face it, when we bake – I mean bake a lot, baking pans are a must. You can get any branded ones but, I prefer baking pans from 360 Bakeware. These baking pans allow conduction of heat evenly and ensure consistent baking throughout!


   4.  Pastry Scraper: 
       I am totally in love with my pastry scraper. Not only is it helpful while baking, it’s very handy in transferring chopped toppings from the chop board to the bowls! These are amazing are they even work out as replacements for icing knives! 


        5.  Cup Cake Molds/Pans: 
       Cupcakes are one of the things that you would bake in the initial stages of baking. The cupcake molds are   silicon molds which are oven safe. The cup cake pans cut the baking time and are more of an advantage    because you won’t have to buy multiple pans whereas the cupcake molds would mean buying a number of  them. Also, the pans are a lot less work and easier to get in and out of the oven. And you can also bake  other things like breads or pops in them!


   6.  Wax Paper Liners/Butter Paper: 
       Most bakers just grease their pans and pop them in the oven, but personally, after greasing I like adding a wax paper/butter paper to the bottom of the pan. Trust me! The cake comes out with such ease when you put one of these babies!


   7.  The Beginners Frosting Set: 
      After you venture into baking, you would definitely want to learn about frosting and its techniques. So, for that here are basic things you would need:


§  Disposable Frosting Bags: These are available everywhere and are so much easier to manage than the cloth icing bags and you can just dispose them once you are done.


§  Frosting Tips: You will get a variety of frosting tips. When I started, I picked the ones I was most curious to work with that way, choosing the tips wouldn't be much of a problem.


§  Frosting Tip Holder/Securer: These are handy when you are frosting, they hold the tip in place and make sure the tips don’t come off or tilt in the wrong angles while frosting.


   8.  Cake leveler:  
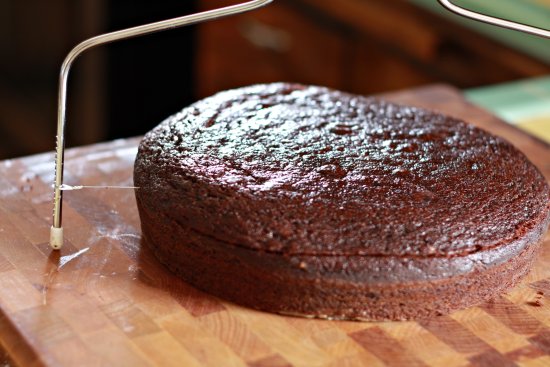
      You can buy a cake leveler, if you are interested but a large knife would just do the trick. But if you’re obsessed with perfection like me, you would want to buy a cake leveler to get that perfect and smooth cake surface!


These things are simple and definitely easy to gather! They’re always handy and would never feel like a waste in the kitchen when it comes to baking! Hope you peeps found this useful!


Happy Baking! ^_^